Lobster and Summer Pea Pasta

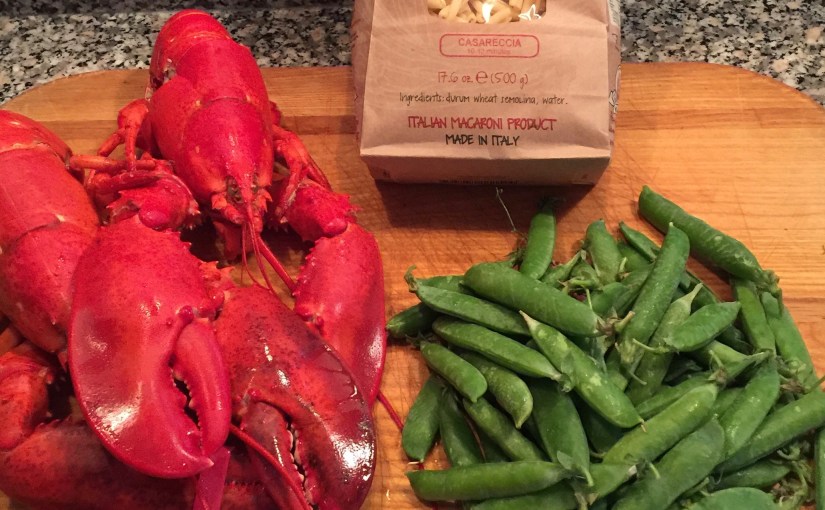
This is a quintessential summer dish and is best when you can get fresh peas and pea sprouts.  You can make it much more quickly and easily if you can get the lobsters boiled by your fish market or supermarket.

INGREDIENTS:

2   1 1/4 to 1 1/2  lb. lobsters

1 lb. gemelli pasta

2-3 lbs of fresh peas in pods (or 1 to 1 1/4 cup of fresh or frozen peas)

1 t. kosher salt

1 T. good quality olive oil

1/4 cup heavy cream

3 T. parmigian cheese, grated – plus additional to serve at the table

1  handful of pea sprouts or tendrils (optional)

freshly ground black pepper

PREPARATION:

  1.  If you can get the lobsters cooked by your market, do so.  You can bring them home either warm or cold–it will make no difference.  If you cannot get them cooked, place two inches of water in the bottom of a tall pot (a pasta pot works perfectly) and bring to a boil over medium high heat.   Move off the heat briefly and add the lobsters, covering the pot and returning to the heat to steam for 12-14  minutes until the lobsters are bright red and fully cooked.  Immediately remove from pot but do not discard any remaining steaming liquid.  (Do remove any steaming rack, if one is used.) Allow lobsters and the steaming liquid to cool.
  2. Separate the lobster meat from the shell.  Remove large claws, knuckles and tail from the body. Rinse out any green/tan material from the end of the tail (it is the liver) and the dark vein that runs down the center back of the tail (the intestine).  If there is a hard red substance at the tip of the tail, save this (it is the roe from a female lobster) Break the large claws and remove the meat to a bowl.  Do the same with the claws and the tail.  If not making the dish immediately, place bowl of lobster meat covered tightly with plastic wrap in the refrigerator. (This can be done through step   a day or two ahead.)
  3. Place the shells from the claws, knuckles and tail along with any roe you have saved in the pot with the steaming water .  Add the small legs from the lobster bodies (you can also add the bodies if you remove the heads, but this may be too much effort for the small increase in flavor that results), as well as 2 quarts of water and 1/2 to 1 t. of salt and bring to a boil.  Boil the shells covered for 15-20 minutes to extract their flavor.  At the end of that time, remove the cover, take out and discard the shells and allow the liquid to reduce by at least 1/4 and up to 1/2.  You will have more lobster stock than you need, but it is great as the basis for any seafood or fish soup or chowder and can be frozen for later use.
  4. Remove the lobster stock from the pot reserving about 1/2 cup for use in this recipe, and clean out the pot to cook the pasta.
  5. Bring the pasta pot filled with clean salted, water to a boil over medium high heat.  While the water is boiling, remove the lobster meat from the refrigerator, if necessary.
  6. If using fresh peas, at the same time bring a smaller pot of water to boil over medium high heat.  When boiling, add the peas and cook for 2-3 minutes until just barely tender.  Remove and set aside.  If using frozen peas, remove from the freezer allow to begin to thaw on the counter.
  7. Cook the pasta according to package directions and drain immediately when it is al dente.
  8. Place 1 T. of olive oil in the warm pasta pot and return the pasta to the pot.  Add the reserved lobster stock, cooked lobster meat, fresh or frozen peas and stir to combine.
  9.  Turn the heat to medium low, just to warm everything through.  This should take 2-3 minutes.
  10. Add the cream, 3 T. of grated parmigian and the black pepper and stir to throughly coat the pasta and lobster.
  11. Serve garnished with pea sprouts tor tendrils, if using, and more parmigian.


Butternut Squash and Sweet Potato Soup

This soup is fabulous for fall or winter, but really can be served in any season as long as you can get good quality butternut squash. We had it recently as spring is turning to summer and with a bit of heat from curry powder and some naan and salad on the side, it fit the bill nicely. The spices in this can be changed to suit a number of different cuisines–Mexican chili could replace the curry, for example, and sour cream and minced jalapeno could replace the yogurt and mustard seeds.

INGREDIENTS:

1 medium to large butternut squash

1 large or two small sweet potatoes

1 T. neutral oil (such as canola) or olive oil, if you prefer the taste

1 small to medium onion, chopped

2 cloves of garlic, minced

1 quart low-sodium chicken stock (the best I have found is 365 brand from Whole Foods)

2 t. curry powder

1 t. cumin (optional)

cayenne to taste (depending on how hot the curry powder, and how spicy you like your soup)

salt and pepper, to taste

Greek yogurt and mustard seeds, optional for garnish


PREPARATION:

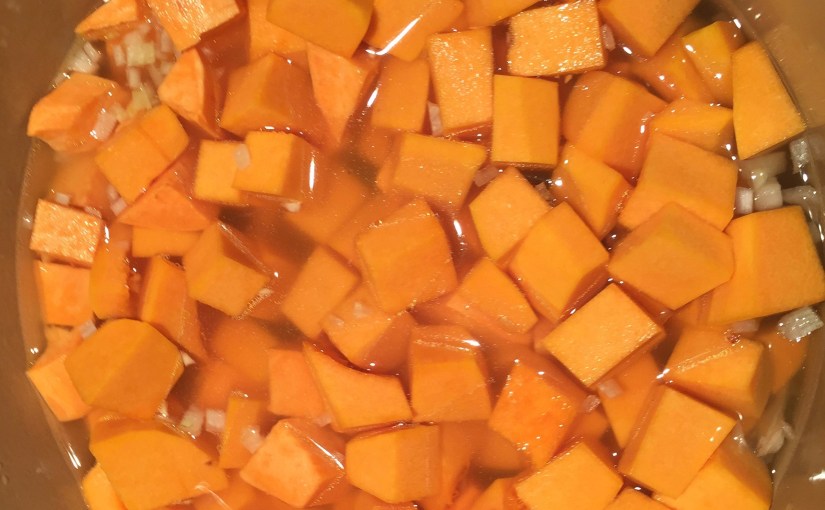
  1. Peel and remove the seeds from the squash and cut into chunks of about 1″.
  2. Heat oil over medium low heat in a pot large enough to comfortably hold the squash and sweet potatoes, add the onion and cook until translucent.
  3. While the onion is cooking, peel and cut the sweet potato into 1″ chunks (sweet potatoes can discolor so it is best to cut them shortly before adding to the pot).
  4. When the onion is wilted and translucent, add the garlic, curry powder, cumin (if using) and cayenne and sauté, stirring, for a minute or so.
  5. Add the butternut squash and sweet potatoes to the pot, giving it a quick stir.
  6. Pour 3/4 of the chicken stock into the pot and increase the heat to medium high until the contents come to a boil.  Reduce the heat to medium-low, cover and simmer until the squash and potatoes are tender.
  7. Puree the soup with a stick blender or in a blender or food processor, until very smooth.
  8. Return the soup to the pot if not using a stick blender,.
  9. Taste for salt and pepper and add more chicken stock if the soup is too thick.
  10. The soup can be chilled and will keep in the fridge for up to three days.
  11. When ready to serve, reheat and top with a dollop of yogurt and a sprinkling of mustard seeds.

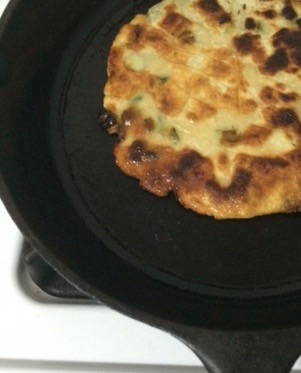
Crispy Scallion Pancakes

Scallion pancakes are always one of my favorite things to order at Chinese restaurants, but while some are really wonderful, others can be greasy and heavy.  It seemed like a good idea to learn to make them myself so there would be reasonable quality control.  After testing several recipes, this one is a hybrid of several (especially the blogs seriouseats and the kitchn) with technique from Cook’s Illustrated thrown in.

This recipe will make four pancakes,  if that is more than you want, see the note in teh recipe about refrigerating half the dough for later use.

Photo:  courtesy of Sarah

Ingredients

  • 1 bunch of scallions (mainly green part sliced thinly across)
  • 2 cups all purpose flour (with extra for rolling)
  • 1 cup boiling water
  • 2-3 t Sesame oil
  • 2-3 T oil for frying – I recommend canola or peanut oil
  • salt

Instructions

  • In a bowl, mix the flour and boiling hot water until it forms  a smooth dough (stir with wooden spoon, this will take a little while and it is key that the water be really hot)
  • Remove the dough from bowl, on a lightly floured board or counter fold it over on self a few times to get it really smooth
  • Put the dough back in the bowl (as long as it is relatively clean), cover with plastic wrap and leave in a warm place to rest for at least 30 minutes
  • After the dough has rested, divide it into 4 pieces and roll each piece into a ball (NOTE:  or divide in half and put half in the fridge wrapped tightly in plastic wrap for up to 5 days)
  • For each ball, roll out on a lightly floured surface into a circle that measures 8 inches across (use a ruler), and paint a very, very thin layer of sesame oil on top of the circle
  • Roll the dough up like you are making a jelly roll (thinner at the ends), then twist the roll into a spiral
  • Smack the spiral with your hand to flatten it a little
  • Roll the dough out to 8 inches a second time
  • Paint again with sesame oil
  • Sprinkle with scallions (1/3-1/2 cup of scallions per pancake)
  • Roll and twist the dough into a spiral again, and again lightly smack it
  • Roll it out one final time into a 7 inch round disc.  This is the final.
  • Heat the canola or peanut oil in a nonstick pan (cast iron is best but not necessary) until it is shimmering
  • Carefully slip the pancake into the pan
  • Gently shake the pan to avoid sticking and so the pancake browns evenly
  • After 2-3 minutes – if its really brown and crusty- flip it over
  • Repeat on the other side
  • Remove the pancake from the pan and drain on paper towels.  While pancakes are hot, sprinkle with salt.

NOTE:  The white part of the scallions can be chopped and combined with soy sauce and mirin for a simple dipping sauce.

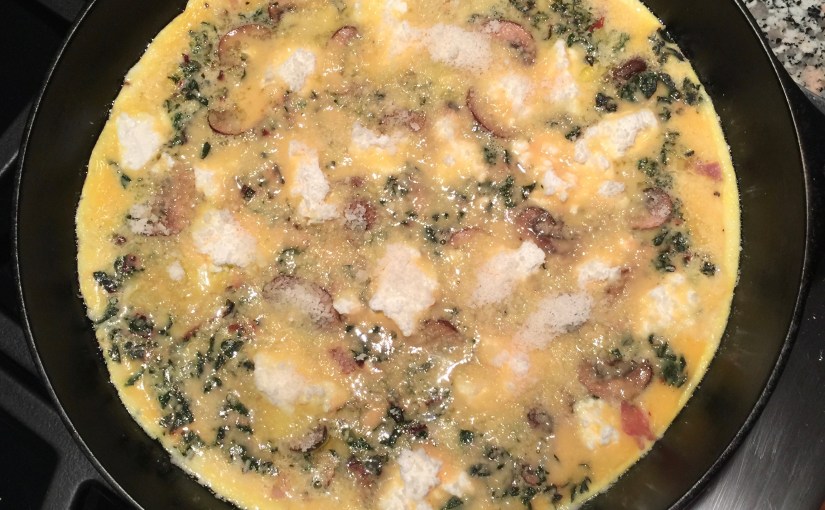
Frittata

This recipe is one of the easiest to make, is almost infinitely adaptable, and is just as good for dinner as it is for breakfast or brunch. You can even treat it like a pizza and put one set of fillings on one half and a different on the other.  It is best made in a cast iron pan but, if you don’t have a very well seasoned one, any pan that go in the oven as well as on top of the stove will do.

Serves 4 (you can cut it in half, but the leftovers are good for several days so why not amke the whole thing).

INGREDIENTS:

8 large eggs

1/2 cup whole milk

1/2 t. salt

1/4 t. freshly ground black pepper

2 T. olive oil

2-3 T. grated parmigian cheese

Fillings of your choice, they should equal about 2 cups and should be precooked.  Some good combinations are:

  • sautéed onions, mushrooms, and asparagus
  • sautéed onions and garlic, chopped roasted red peppers, shredded cheddar or Monterey jack cheese
  • smoked salmon finely chopped, sautéed onions and creme fraiche
  • cooked (and drained) spinach and prosciutto

PREPARATION:

  1.  Cook all the fillings that are raw in advance of making the frittata and, if they are wet (like spinach or mu=shrooms) drain them well.
  2. Preheat the oven to 350 degrees.
  3. Beat the eggs,.milk, salt and pepper together in a bowl
  4. Heat a fry pan that can go in the oven over medium heat and then add the olive oil (you will need it all to keep the frittata from sticking).
  5. Pour the eggs into the pan and allow to cook for just a minute or so to set the bottom
  6. Add the fillings and gently press into the frittata.
  7. Cook until the edges are just set and starting to change color (4 to 5 minutes – see picture above)
  8. Sprinkle the grated parmigian over the top of the frittata and place on a middle or upper shelf in the oven.
  9. Cook for 10-15 minutes until the frittata is fully set.
  10. Allow to cool for 5 minutes or more before slicing and serving.


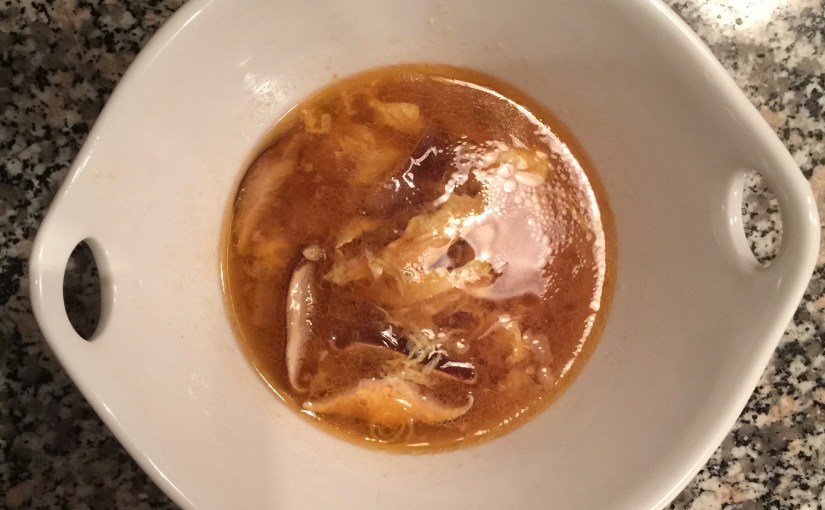
Hot and Sour Soup

I love how recipes pass from person to person, often with some tinkering to take into account personal preferences or regional ingredients.  This recipe, as I understand it, came from 101 Easy Asian recipes and began with Joanne Chang (one of my favorite chefs).  It was then adapted by the Smitten Kitchen blog.  That is where I found it and Kate and I adapted it further last week to suit our own tastes.  It is  one of the best hot and sour soups I have ever had–clean and bright tasting! It is also an amazingly easy and quick soup to put together, making it truly perfect for a weeknight meal when time is short.  Rice or veggies as a side would be all you would need to make the meal complete.

Serves 4.

INGREDIENTS:

2 T. canola oil

1/2 lb. ground pork

1 T. minced garlic

1 T. minced fresh ginger

1/2 cup sliced scallions

5-6 shiitake mushrooms, cleaned and sliced thinly

4 cups low-sodium chicken broth (the 365 brand from Whole Foods is the one we use)

1/4 pound (about 1/3 of a typical package) of firm (not extra firm) tofu, cut into small dice

1/3 cup rice wine vinegar

3 T. soy sauce

1 t. sugar

1 t. black pepper

1 t. sesame oil (preferably toasted)

1 T. Sriracha (or the hot sauce of your choice)

2 eggs, beaten

6-8 pea pods sliced thinly on the bias

a handful of pea shoots or microgreens, washed (definitely optional)

PREPARATION:

  1.  In a saucepan (or pan with straight sides that is deep enough to hold soup), heat the oil over medium heat and add the ground pork breaking up with a spoon, then the garlic,  ginger and scallions and cook, stirring frequently until the pork is fully cooked and the garlic and ginger are fragrant (3-5 minutes).
  2. Add the chicken broth, mushrooms, tofu, vinegar, soy sauce,  sugar, pepper, sesame oil and Sriracha and bring to a simmer.
  3. Check the seasonings and add more soy sauce or pepper if needed (extra Sriracha or hot sauce can be served on the table).
  4. Stir constantly while slowly drizzling the eggs into the soup (it helps to have two people for this step) and cook until the eggs coalesce into small distinct strands (this happens in just a minute or so).
  5. Top with the pea pods slices and pea shoots or microgreens, if using, and serve.
  6. Extra Sriracha and soy sauce are good to have as condiments on the table.


Sunburst Tart

This is a adaptation of a recipe that I found on the Smitten Kitchen blog.  It can easily be used as an appetizer, snack or desert–just change the filling and sprinkling on top. I have made it with tapenade and pesto as fillings and Kate has made it with Nutella and cocoa.  All were a hit!

The recipe below is for tapenade but any filling that you make that is relatively dry (so it doesn’t leak out)  will work.  For the prettiest presentation, the filling should be dark enough to contrast with the puff pastry when it is cooked. You can use a range of options for dipping sauces (see below the main recipe for ideas).

INGREDIENTS:

2 sheets of frozen puff pastry, thawed for 6 or more hours in the fridge. [I like Dufours but it is really expensive and requires two packages.  Pepperidge Farm–which has 2 sheets in one package–works just fine.]

4-6 oz. of black olive tapenade [you can buy this at Trader Joe’s and Whole Foods or make your own]

a big dollop of tomato paste (1-2 T) or up to ⅛ cup of sundried tomato pesto or spread

¼ cup grated parmesan cheese(or more if the tapenade is too loose to spread easily)

splash of lemon juice or vinegar (for brightness)

black pepper to taste

1 egg

1 T of water

Sesame seeds for sprinkling

PREPARATION:

  1.  Preheat the oven to 400 degrees.
  2. Put a sheet of parchment on a baking sheet.
  3. Make the filling:  combine the tapenade, tomato paste/pesto, cheese, lemon juice/vinegar and black pepper in a bowl.  Mix thoroughly using a spoon [the consistency should be pretty thick, although lighter and more spreadable than peanut butter].
  4. Open one puff pastry and roll out so that you can cut a round that is 11″ to 12″ across (you can use a plate or a circle cut out of paper as a guide, having a close to perfect circle is really important).
  5. Place the first circle of puff pastry on the baking sheet.
  6. Spread the filling over the puff pastry circle leaving a 1″ border all around.
  7. Roll out the second puff pastry and cut to a circle identical to the first.
  8. Using a finger, wet the border of the bottom pastry with water.
  9. Place the second circle on top and gently press down to seal the edges.
  10. If possible, place the pastry back into the fridge or freezer for 5-10 minutes to get cool again.
  11. Place a juice glass or small cookie cutter in the middle of the pastry (about 2 ½” across)–DO NOT PRESS DOWN!
  12. Using a sharp knife (and a small plastic ruler that has been thoroughly washed, if you have one) make radiating cuts from the glass to the edge to divide the tart into 32 rays.  [The easiest way to do this is to make cuts on opposite sides, first to divide into 2 parts, then 4, then 6, etc., until you have 32.  NOTE:  the end of the ray closest to the center will be fairly small, so consistency is important.]
  13. Remove the glass or cookie cutter.
  14. Placing a finger gently at the top of the ray, hold the bottom and twist the ray three times.  Do the same with each until all are twisted. [Sometimes it is easier to twist all the rays twice, get them placed, and then go back to make the third twist.]
  15. If the dough seems soft at any point, or when you are done, place in the fridge or freezer again for a few minutes.
  16. Gently beat the egg with the water.
  17. Brush the top of the tart gently with the egg wash.
  18. Sprinkle sesame seeds (or theory sprinkling) on top.
  19. Bake for 10 minutes at 400 degrees and then reduce the temperature to 375 and bake for another 15 to 30 minutes until the tart is golden and the pastry is clearly cooked and crisp on the edges. [NOTE: You may want to rotate the tart halfway through this last time so it browns evenly.]
  20. Allow to cool for at least 5 minutes then gently, using the parchment as a support, slide the tart onto a serving plate.
  21. Pull off one ray at a time and dip into sauce and enjoy!

IDEAS for VARIATIONS:  For the filling use basil pesto and parmesan cheese; or sundried tomato pesto (well drained) with herbs that have been run through a blender together; or Nutella with sweetened cocoa powder (sprinkle top with sanding sugar instead of sesame seeds); cinnamon, brown sugar and finely chopped (or ground) pecans (also use sanding sugar), ….

DIPPING SAUCE:  This is not absolutely required, but adds another dimension to the dish.  The easiest way to make a dipping sauce for the savory tarts is to combine cheese (feta, parmesan, goat cheese) and/or herbs (basil, thyme, rosemary) with a mixture of sour cream and cream cheese in a blender, then to mix in a little lemon juice or vinegar (or even hot sauce) to cut the richness.  If you are  making a sweet tart, whipped cream (flavored or not), hot fudge, caramel sauce, or pureed fruit  are all good choices. Note: the rays when torn off will not be very strong, so the sauce needs not to be too thick (a mistake I have made).


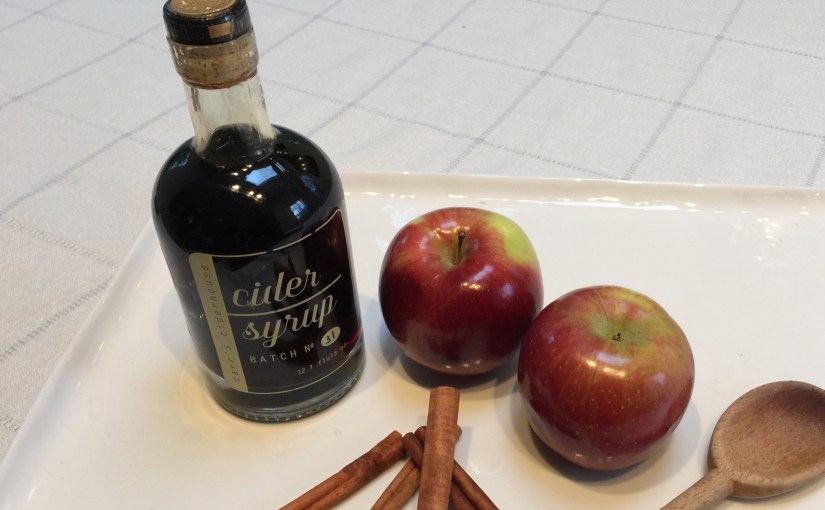
Apple Pancakes

This is a recipe for–mostly–traditional pancakes  with the addition of grated apple and amped up apple flavor.  Very nice on a cool fall or cold winter morning.

INGREDIENTS:

2 cups all purpose flour

1 T. baking powder

½ t salt

1 t. sugar

1 egg (preferable extra large)

1 ½ cups whole milk

¼ cup apple cider syrup (optional, see note below about purchasing – if you don’t have apple cider syrup and you do have apple cider simply boil down ½ cup until reduced to the needed amount).

2 T. melted unsalted butter, plus more for the pan or griddle

2 large or 3 small honey crisp apples, peeled and grated on the large holes of a box grater.

PREPARATION:

  1. Mix the dry ingredients (flour, baking powder, salt and sugar) together in a large mixing bowl.
  2. Melt the 2 T. of butter in a small dish in the microwave.
  3. Measure the milk into a 2 cup container and add the egg, beating to combine.  Stir in the apple cider syrup, if using.
  4. Pour the milk and egg mixture over the dry ingredients and then add the melted butter.  Mix well to combine (a whisk works well for this step but a wooden spoon will work as well).
  5. Add the grated apple and stir just until the apple is distributed throughout the batter.
  6. Heat a fry pan or griddle with 1-2 t. of unsalted butter over medium-heat (butter should sputter but not burn).  When hot, pour about 1/4 cup servings of batter onto the hot pan at a time to make 3-4 inch circles, you may have to move them around a bit to get circles.
  7. Cook on the first side until bubbles appear on top and are set.  Turn and cook on the second side until both sides are golden.
  8. Serve with maple syrup or, if you really love apples, more apple cider syrup.

Carr’s Apple Cider Syrup is expensive, but definitely worth the splurge if you like apples.  It can be used in apple pies, crumbles and on roasted meat and vegetables.  If you don’t see it in a local specialty shop, you can buy it from mouth.com.


Butternut Squash and Sage Pizza

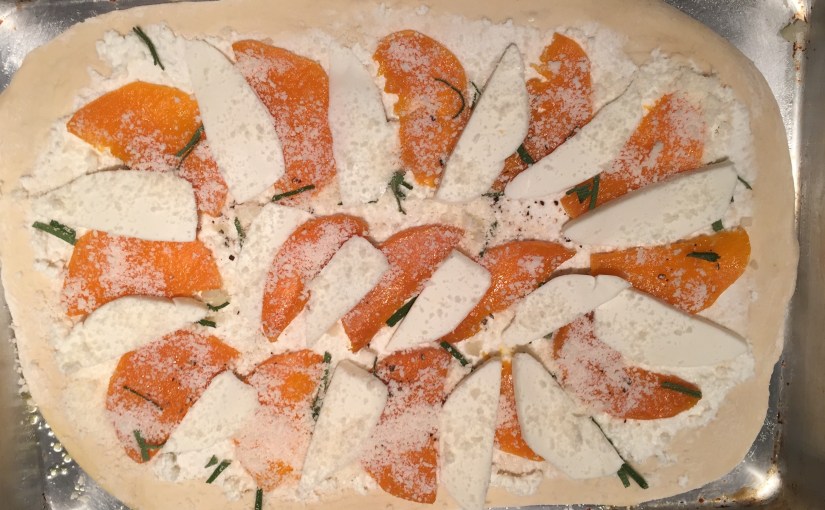
This is a white pizza that goes well with a hearty soup or a salad.  If you have leftover roasted butternut squash, this is an incredibly quick weeknight meal.

Serves 2

INGREDIENTS:

½  ball of pizza dough (Whole Foods or any other store brand white, thawed if frozen)

1-2 t. olive oil

½ cup  whole milk ricotta cheese (mascarpone can be substituted if you can’t find a good ricotta)

6 oz. of thinly sliced cooked butternut squash (if you need to make this, take a peeled half butternut squash, slice into 1 ½” half moons, coat with oil, season with salt and roast in a 375% oven–a toaster oven will do–until tender, about 30 minutes).

3-4 oz. mozzarella, cut into thin half moons (about half a baseball sized fresh mozzarella) or you can substitute shredded mozzarella

4-6 good large sage leaves, sliced lengthwise and then across very thinly

2-3 T. parmigian, grated

Black pepper to taste

PREPARATION:

  1. Preheat the one to 425 degrees.
  2. On a lightly floured surface with hands and a roller that are also floured, roll the dough into a disc until it won’t continue to stretch, cover with a piece of foil and let rest for 5 minutes or so.
  3. While the dough is resting, shred the mozzarella, slice the sage leaves and grate the parmigiana.
  4. Re-roll the dough to make a large oval.  Cover again and let rest for anywhere from 5 to 10 minutes.
  5. Take a cookie sheet or baking pan and lightly grease with the olive oil.
  6. Roll the dough one more time and transfer to the cookie sheet.  Reshape and spread the dough with your hands to achieve the thickness of crust you like best.  (I prefer a medium thin crust for this pizza.)
  7. Spread the ricotta thinly over the dough, working to make it even using the back of a large spoon.
  8. Arrange the slices of squash on top of the ricotta.
  9. Intersperse mozzarella slices with the squash.  (If using shredded mozzarella, sprinkle evenly over the top.
  10. Sprinkle the shredded sage over the squash and mozzarella and then sprinkle the parmigian over all. Top with a good grinding of black pepper.
  11. Bake in the preheated oven until the crust is golden and the cheeses are melted and just beginning to take on color.

Maple Pecan Scones

Just a little change to my traditional scone recipe made these perfect for Christmas morning this year, although they would be good almost any time the weather is a little chilly.

This makes 8 to 12 scones, depending on how big you make each one.

Ingredients:

2 cups all purpose flour

1 T. baking powder

1 T. white sugar

2 T. dark brown sugar

½ t. salt

½ t. freshly ground nutmeg

8 T. cold unsalted butter

1 egg

1/3 cup milk

1 cup of confectioner’s sugar

4 T. maple syrup

1 – 2 T. milk or cream

chopped pecans, optional

Preparation:

  1. Preheat the oven to 450 degrees.
  2. This recipe can be made in either a food processor or by hand.  Place the flour, baking powder, white and brown sugars, salt and nutmeg in the bowl of a food processor or in a large mixing bowl.  Pulse the food processor on and off to combine ingredients or mix with a fork or whisk.
  3. Add the butter cut into small pieces to the flour mixture and pulse 20 or so times in the food processor, or using a pastry blender or two sharp knives cut through the mixture, until the mixture looks like a coarse meal.
  4. Slightly beat the egg in a small bowl and divide into two portions.
  5. Add half the egg and the 1/3 cup of milk to the dough, and process briefly (10 seconds or so) in the food processor or mix by hand with a wooden spoon until the dough just starts to come together (it should have large clumps).
  6. Place the dough on a lightly floured work surface  and fold over on itself several times until it comes together in a single ball (if you have wax or apartment paper under the dough you can use this to fold it by pulling the sides up and over).
  7. Roll or pat the dough to ½ to ¾ inch thickness.  Cut into rounds (2 inches or more) or into triangles, and place on a ungreased cookie sheet.  (The dough can be chilled at this point for 10 minutes or more to make certain the scones are fluffy – the butter solidifies in the fridge so it creates steam when cooked).
  8. When ready to bake, mix the other half of the egg with 1 T. or so of cold water, and brush over the top of the scones.
  9. Bake for 10-15 minutes until the tops (and bottoms) are a light golden brown, then cool on a wire rack.
  10. While scones are baking, make glaze.  Combine confectioner’s sugar and maple syrup and beat well with a fork or small whisk.  Mixture will be quite stiff.  Slowly add the milk until the glaze is just thin enough to drizzle over scones, but thick enough not to run off.
  11. When scones are fully cooled, drizzle glaze over them and sprinkle chopped pecans on top of the glaze.


Spaghetti Carbonara

Ingredients:

1 lb. dried spaghetti or linguine
1/4 to 1/3 lb. bacon or pancetta cut into very small pieces
2 T. butter
2 eggs
1/2 cup whole milk or half-and-half
1 cup freshly grated parmesan cheese, plus extra for topping
salt and pepper

Preparation:

1. Cook the bacon in a skillet over medium heat until crisp. Remove bacon from pan but save 2-3 T of the fat. Wipe the pan clean.

2. Bring a large pot of salted water to a boil. Salt the water to taste like sea water.

3. Add the pasta to the boiling water and cook until it is just barely done (it will continue cooking a bit while you drain it).

4. While the pasta is cooking, heat the skillet or other a large pan over very low heat. Add the butter and the reserved bacon fat and heat until the butter is just melted. Keep warm over very low heat.

5. Break the eggs into a small bowl and mix to break up. Add the milk or half-and-half.

6. Drain the pasta and add to the pan with the butter and bacon fat. Toss to coat the pasta.

7. Pour the egg/milk mixture over the pasta and toss to make certain the eggs are evenly distributed and do not scramble. Sprinkle the cheese over the pasta and toss until melted.

8. Top with freshly ground pepper and more grated cheese, if desired.

Serves 4.